
25 min read ·
How to Choose and Plan a Polished Plaster Finish
Under grazing daylight or wall-wash lighting, the finish may look dramatic, but the same lighting can expose a drywall wave or unwanted tool mark.
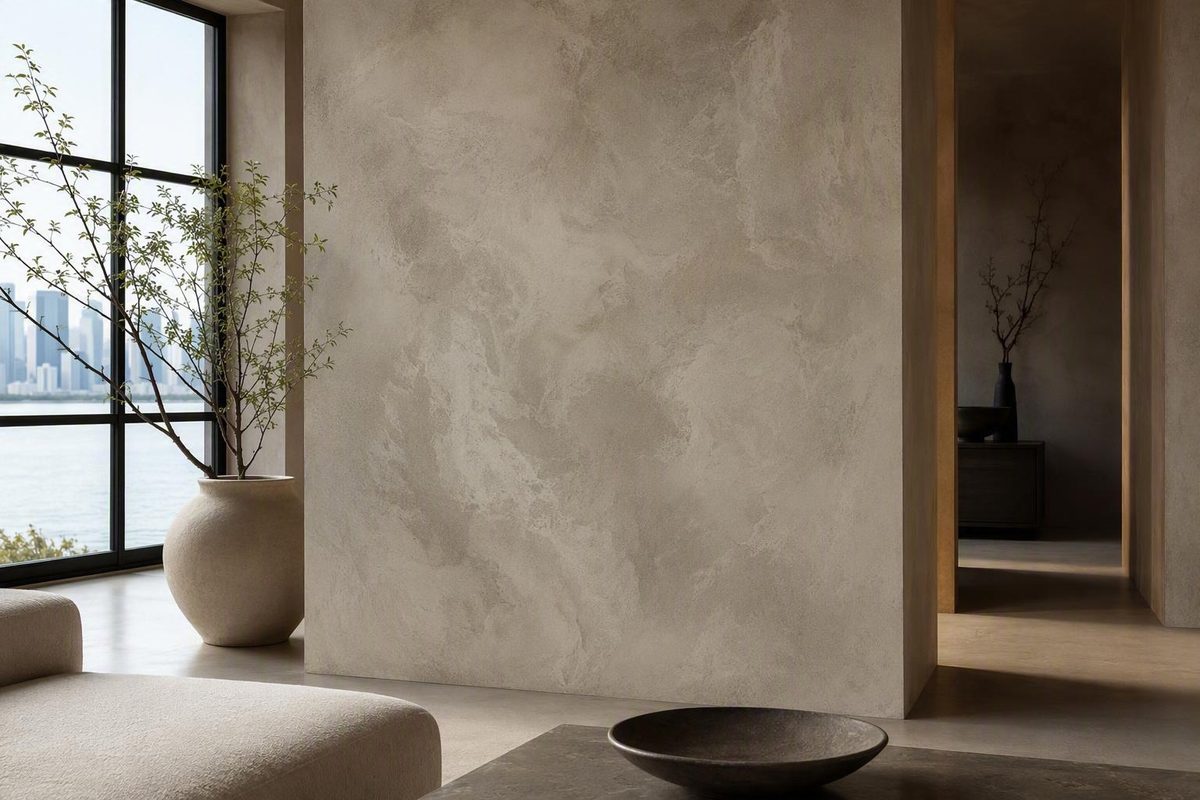
Venetian stucco can describe a mirror-smooth feature wall, a softly mottled limestone effect, or a textured mineral finish. These surfaces may share a trowel-applied appearance, but they are not necessarily made from the same ingredients or approved for the same conditions.
Choosing by color or by the words Venetian plaster alone can result in the wrong primer, installation method, protective coating, or room placement. The safer planning rule is simple: identify the binder and exact finish, confirm its approved uses, inspect the substrate, approve a complete physical sample, and follow one compatible system from preparation through maintenance.
The examples below illustrate how specifications vary. They are not universal instructions, and commercial claims should not replace the technical data sheet, product label, safety data sheet, or written guidance for the selected system.
What Venetian stucco is—and what the name does not tell you
Venetian stucco is a commonly used name for a family of thin, trowel-applied decorative finishes for walls, ceilings, and architectural details. Depending on the formulation and technique, it can create subtle tonal movement, a limestone-like surface, or a smooth finish resembling polished marble.
Venetian plaster and polished plaster are often used as broad or overlapping terms.
Stucco Veneziano commonly identifies a fine, high-gloss subtype rather than the only authentic Venetian finish. Marmorino generally describes related matte, low-sheen, smooth-stone, or deliberately textured finishes, although individual suppliers classify products differently. One commercial comparison places Stucco Veneziano, Grassello, and several forms of Marmorino within a broader family of Italian decorative plasters in its explanation of Venetian plaster and stucco terminology.
Decorative Venetian stucco also differs from conventional building stucco. Conventional stucco is generally thicker, coarser, and commonly associated with exterior wall systems. Venetian stucco is usually installed in much thinner decorative coats and worked with a trowel to produce controlled movement, texture, or polish.
Although both categories can contain mineral ingredients, their specifications are not interchangeable. An exterior stucco assembly should not be substituted for a decorative-plaster system, or vice versa, simply because both products are called stucco.
Most importantly, appearance does not define composition. Two containers labeled Venetian plaster may use different binders, aggregate sizes, pigments, primers, coat schedules, polishing methods, and protective finishes. One may be a lime-and-marble plaster intended for burnishing; another may be an acrylic material designed for wet-on-wet blending; a third may be a faux coating that imitates trowel movement.
Before comparing colors, identify:
- The primary binder: lime, acrylic, cement, or a mixed formulation
- The type and size of mineral aggregate, if any
- Whether the material is a plaster or a decorative faux-look coating
- Its approved substrates and interior or exterior status
- Its primer, coat, curing, polishing, and protection requirements
- Any restrictions involving water, weather, heat, or frequent handling
The useful question is not merely, “Is this Venetian stucco?” It is, “Which complete product system is this, and is that system approved for my surface and room?”
Traditional lime, acrylic, cement, and faux formulations compared
Traditional Venetian plaster is commonly based on slaked lime or lime putty combined with fine marble material and mineral colorants. It is installed in multiple thin layers and compressed or burnished when a polished result is wanted.
That description does not cover everything marketed as Venetian stucco. Modern products may use acrylic binders, cement, polymers, fillers, or combinations of mineral and synthetic ingredients. Binder labels are useful starting points, but they do not establish a category-wide winner for strength, durability, ease, health, or performance.
Traditional lime formulations
Lime-based plaster is the formulation most closely associated with traditional Venetian craft. Its working and curing behavior makes coat thickness, timing, trowel pressure, and substrate preparation especially important. It may be sold as a fine polished plaster or a coarser Marmorino-style material, so “lime” does not necessarily mean glossy.
Modern additives may also appear in products that remain principally lime-and-marble formulations. Stucco Italiano, for example, describes most of its mineral range as lime plaster with marble aggregate while identifying Beton Stucco and Pastellone as cement-bound products in its mineral-plaster overview. The exact technical documentation is therefore more useful than broad labels such as “natural,” “traditional,” or “mineral.”
Acrylic Venetian plaster
Acrylic Venetian plaster is a distinct modern formulation, not simply traditional lime plaster in different packaging. Depending on the product, it may be designed for extended working time, blended colors, veining, or a particular high-gloss effect. Its preparation and polishing instructions may differ substantially from those for lime.
As one product example—not a definition of the category—The Decora Company lists San Marco Stucco Veneziano as an acrylic, high-gloss decorative plaster on its retailer product page. That classification should not be extended to every material called Stucco Veneziano.
Cement-based decorative finishes
Cement-bound decorative finishes form another category within some manufacturers’ mineral-plaster ranges. They may be selected for particular visual effects, substrates, or exposure conditions, but they are not interchangeable with traditional lime putty merely because both are troweled.
Do not borrow instructions from a lime-plaster tutorial unless the manufacturer confirms that they apply.
Faux Venetian-look coatings
A faux product seeks to reproduce some of the visual characteristics of Venetian plaster without necessarily sharing its traditional composition. In handling, it may be closer to a thick decorative coating than to lime plaster.
This distinction is easy to miss in DIY demonstrations. In a BYOT tutorial, the presenter explicitly states that the Valspar material being used is not traditional Venetian plaster but is intended to create a similar appearance. The demonstration uses knives and a finishing trowel and presents burnishing as optional, so it should be understood as a method for that particular Venetian-look coating rather than a universal lime-plaster process in the direct BYOT video.
| Product family | Typical composition | Possible appearance | General application approach | Approved locations to verify |
|---|---|---|---|---|
| Traditional lime | Lime or lime putty with fine marble material and mineral ingredients | Matte stone, soft movement, smooth polish, or high gloss | Multiple thin troweled coats; compression or burnishing where specified | Interior or exterior status, wet areas, direct water, and heat-adjacent use |
| Acrylic | Acrylic or polymer binder with pigments and fillers; composition varies | Smooth gloss, blended color, veining, or marbleized effects | Product-specific primer and thin decorative layers; may use trowel polishing, sanding, or another prescribed method | Wet areas, exteriors, furniture, and heat limitations |
| Cement-based | Cement as a principal binder, often with mineral aggregate and additives | Concrete, stone, matte, textured, or polished effects | System-specific priming, coats, curing, and protection | Substrates, exterior exposure, water, movement, furniture, and heat |
| Faux-look coating | Decorative coating formulated to imitate Venetian movement | Mottled, layered, lightly polished, or paint-like effects | May use a roller, knife, or trowel depending on the product | Do not infer exterior, wet-area, or heat approval from appearance |
There is no supported basis for saying that one binder category is universally stronger, easier, healthier, safer, or longer-lasting. Performance depends on the actual formulation, substrate, installation, exposure, maintenance, and compatibility of the complete system.
Choosing between polished, matte, and textured finishes
Venetian stucco ranges from softly matte and almost chalk-like to glassy and highly reflective. Between those endpoints are low-sheen limestone effects, lightly compressed surfaces, fine mottling, pronounced tonal movement, travertine-inspired patterns, and distressed textures.
Sheen does not come only from the material in the container. Aggregate size, coat thickness, trowel direction, pressure, timing, compression, and burnishing all influence the result. Several thin, partially covering passes can produce depth and variation that a uniform paint film does not reproduce.
An unburnished finish may remain matte, rougher, and stone-like. Burnishing compresses an appropriate surface with a clean trowel during its prescribed working stage, producing smoother highlights and greater reflection. Other systems specify fine abrasive sanding, machine polishing, or a combination of methods. These techniques are formulation-specific rather than interchangeable ways to add shine.
Named products illustrate the range. Meoded identifies Stucco Lamundo as a three-coat, high-gloss interior plaster and Marmorino Tintoretto as a two-coat, matte-to-low-sheen finish for properly prepared interior and exterior surfaces in its product application guide. Those are specifications for those products, not universal definitions of polished plaster or Marmorino.
Match sheen to the room and wall
It may look dramatic under grazing daylight or wall-wash lighting, but the same lighting can expose a wave in the drywall or an unwanted tool mark.
Matte and lightly textured surfaces diffuse more light and may feel quieter or more stone-like. Texture does not make preparation defects irrelevant, however, and a pronounced relief should be assessed for cleaning demands in the intended location.
Consider four variables together:
- Viewing distance: Fine movement may disappear across a large room, while strong patterning can dominate a narrow corridor.
- Light direction: Side lighting emphasizes relief, tool movement, and wall flatness.
- Color depth: Dark colors and protective topcoats may make variation and sheen more apparent.
- Maintenance: Walls near food preparation, hands, luggage, or splashes may need protection that changes the final appearance.
Approve a complete physical sample
A sample board should reproduce the intended installation rather than merely display the base color. Use the actual:
- Substrate, or a comparable primed panel
- Primer sequence
- Tint and batch-selection process
- Number and thickness of coats
- Trowel size and stroke pattern
- Compression, sanding, or burnishing level
- Wax, sealer, varnish, or other specified protector
Label the board and inspect it vertically in the intended room. View it in daylight, with the room’s artificial lights on, and under any directional fixtures that will wash the finished wall. Check it from normal entrances and seating positions as well as from close range.
Do not approve color from a phone, monitor, printed catalog, or wet material alone. Color and contrast can change as coats overlap, the material dries, the surface is polished, and a protector is added.
One customer review on the San Marco retailer page alleged that a selected beige arrived with a yellower tone than the catalog showed. That is an unverified individual experience, not evidence of a general color problem, but it reinforces the practical value of approving a completed physical sample.
For a substantial project, the sample can serve as the acceptance standard. The installer, designer, and owner should agree in advance on how much movement, texture, gloss, and handcrafted variation are intentional.
Where Venetian stucco can—and cannot automatically—be used
Common decorative applications include feature walls, ceilings, entrances, living rooms, bedrooms, columns, archways, corbels, and curved architectural details. Thin troweled finishes can be useful where a continuous stone-like appearance is wanted but stone panels would be awkward.
The name Venetian stucco says nothing reliable about exposure approval. Some polished products are intended only for interiors. Selected Marmorino and other mineral finishes are marketed for properly prepared exterior surfaces. Some systems permit protected kitchen or bathroom use, while others impose narrower limits.
Humidity is not the same as direct water
A bathroom wall exposed to ambient humidity does not face the same conditions as the inside of a shower. An occasional kitchen splash is also different from persistent wetting, standing water, or repeated cleaning.
Manufacturer requirements vary. Sydney Harbour Paint Company recommends sealing kitchen and bathroom walls, while other suppliers distinguish ordinary dry interiors from showers, saunas, and spill-prone areas. Such guidance establishes the need to check the exact system; it does not prove that every sealed decorative plaster is suitable for direct water in the retailer’s application and sealing guidance.
Wax, sealer, or varnish may be specified to improve resistance to dirt, water residue, spills, or staining. It should not be treated, without supporting assembly documentation, as proof that an entire shower installation is suitable. Before using a finish in a direct-water zone, require written confirmation covering the substrate or underlying water-management system, decorative finish, penetrations and transitions, protector, curing period, and maintenance method.
Exterior and heat-adjacent installations
For exterior work, choose a product explicitly rated for exterior use and follow its instructions for substrate preparation, weather conditions, curing, rain or freeze protection, and final treatment. An interior-only polished plaster should not be taken outside merely because another Marmorino product from the same manufacturer is exterior-rated.
Heat-adjacent use also requires product-specific review. Stucco Italiano states that some lime- and cement-based products tolerate high temperatures but also warns that sudden temperature changes can crack textured stucco. The same manufacturer requires varnish when specified finishes in its range are used on furniture in its location, heat, and protection guidance. These are manufacturer-specific claims, not category-wide approvals or evidence of compliance for a particular fireplace or heated assembly.
For a fireplace surround, hood, or similar location, obtain written product approval and confirm the requirements of the complete substrate and construction assembly. Decorative plaster should not be expected to compensate for an unstable or unsuitable base.
| Location | General suitability | What must be confirmed |
|---|---|---|
| Ordinary dry interiors | Common application | Substrate, primer, coat system, desired sheen, and cleaning method |
| Kitchens and splashbacks | Possible with selected systems | Splash exposure, stain protection, cleanability, sealer compatibility, and heat limits |
| Bathrooms outside direct-water zones | Possible with selected systems | Humidity and splash approval, required protection, ventilation, and substrate condition |
| Direct-water shower zones | Not automatically suitable | Written approval for the complete underlying and decorative system, including transitions, penetrations, protection, curing, and cleaning |
| Exterior walls | Only with exterior-rated products | Substrate, weather window, rain and freeze protection, curing, sun exposure, and final protector |
| Furniture and panels | Possible for specified finishes | Substrate stability, edges and joints, handling resistance, and protector requirements |
| Heat-adjacent surfaces | Product- and assembly-specific | Product approval, substrate movement, thermal cycling, and requirements for the complete assembly |
Treat phrases such as “suitable for bathrooms,” “water resistant,” and “exterior capable” as prompts to read the complete technical documentation—not as complete specifications.
Substrate preparation: the stage that controls the result
A polished surface cannot hide a poor wall. The shared preparation principle is straightforward: the substrate should be stable, clean, smooth, repaired, and free of dust, grease, loose material, prominent defects, and incompatible coatings.
The required flatness depends on the finish. Directional light and high sheen can reveal joints, ridges, patch edges, fastener depressions, and surface waviness.
Meoded recommends Level 5 walls for its highly polished Stucco Lamundo and acrylic Renaissance Marbleized systems, while giving broader Level 4–5 guidance for Marmorino Tintoretto. It also specifies PVA primer followed by its Quartz Primer for new drywall and a different preparation sequence for glossy paint in its manufacturer application guide. These are Meoded specifications, not universal drywall or primer rules.
New drywall
For new drywall, finish joints and repairs to the flatness required by the decorative system. Remove dust and confirm that the surface has been sealed uniformly before applying any required quartz or textured primer.
One manufacturer’s sequence may call for PVA primer followed by quartz primer. Another may prescribe a different sealer, bonding primer, basecoat, or drying period. Avoid assembling a hybrid system from unrelated tutorials unless the relevant manufacturers confirm compatibility.
Existing flat paint
A stable, flat-painted wall may require cleaning, filling, sanding or dulling where necessary, dust removal, and the selected system’s prescribed primer.
“Painted” does not automatically mean ready. Check for weak layers, chalking, grease, water staining, poorly bonded repairs, and unidentified previous coatings.
Glossy paint
Gloss generally needs to be removed or mechanically dulled. A planning sequence is:
- Sand or otherwise prepare the coating as directed to remove the sheen.
- Remove dust and contaminants.
- Apply a compatible bonding primer.
- Apply any required quartz or textured primer.
- Allow every layer to dry for its prescribed interval.
This is a general sequence, not a substitute for the selected product’s instructions.
Old plaster, masonry, tile, marble, and MDF
These substrates pose different questions involving adhesion, porosity, joints, movement, and moisture. Old plaster may be weak or dusty. Tile and marble are dense and smooth.
Do not improvise one universal treatment. Obtain written confirmation from the decorative-system manufacturer or follow its technical data sheet. The same caution applies to previously coated surfaces when the existing material cannot be identified.
Previously waxed or sealed Venetian plaster is especially uncertain. The protective layer may affect adhesion, but the available evidence does not establish one universal recoating method. The supplier may require removal, abrasion, a test patch, a specific bonding primer, or replacement.
| Substrate or condition | Planning guidance | Status |
|---|---|---|
| New, properly finished drywall | Repair, flatten, remove dust, seal, and use the specified primer system | Broad principle; primer sequence is manufacturer-specific |
| Stable flat paint | Clean, repair, dull where required, and apply the prescribed primer | Broad principle |
| Glossy paint | Remove sheen, clean, use a compatible bonding primer, then any required texture primer | Broad sequence; confirm products |
| Sound old plaster | Check adhesion, cracks, dusting, moisture, and compatibility | Technical approval advisable |
| Masonry | Check moisture, salts, cracks, porosity, and base preparation | Technical approval required |
| Tile or marble | Do not apply directly without an approved preparation and bonding system | Technical approval required |
| MDF or furniture panels | Confirm edge, joint, movement, primer, and protector requirements | Technical approval required |
| Previously waxed or sealed plaster | Identify or test the coating and obtain recoating instructions | Unresolved without product-specific guidance |
| Active cracks or unstable surfaces | Resolve the underlying cause before decorative work | Broadly applicable |
| Moisture-damaged substrate | Identify and correct the moisture source before coating | Broadly applicable |
A thin decorative finish should not be expected to bridge active movement, stabilize loose material, or solve a moisture problem. If cracks recur, investigate the base before applying another decorative layer.
The installation workflow, from sample board to sealer
Although products differ, a sensible project sequence is:
- Choose the exact product and desired finish.
- Produce and approve a complete sample board.
- Protect floors, trim, adjoining walls, fixtures, and openings.
- Repair, flatten, clean, and prime the substrate.
- Apply the required thin coats in the specified sequence.
- Develop the intended movement or texture.
- Burnish, sand, or polish using the approved method.
- Allow the finish to dry or cure for the required period.
- Apply a compatible protector if the system or exposure requires it.
- Observe any waiting period before cleaning, handling, or exposing the surface to moisture.
Check product safety documents before work
The available product and application pages do not establish one universal safety procedure for lime plaster, acrylic products, pigments, primers, sanding, waxes, sealers, or removal work. Before starting, obtain the current label and safety data sheet for every product in the system.
Use those documents to determine required skin and eye protection, dust-control measures, ventilation, respiratory protection where specified, cleanup, storage, and disposal. Do not assume that a product described as mineral, lime-based, acrylic, natural, or low-VOC has the same handling requirements as another formulation.
If the work involves an unidentified existing coating, extensive abrasion, a solvent-containing product, difficult access, or conditions not covered by the documentation, stop and seek product-specific technical advice rather than improvising.
Coat counts vary for a reason
There is no universal coat count. Formulation, aggregate size, opacity, color treatment, substrate, and desired finish all matter.
Some systems specify two decorative coats; others specify three or include a separate basecoat plus several finish passes. Count the complete system rather than only the layers carrying the final color.
“Thin” should still be interpreted through the product instructions rather than guessed.
Drying and curing schedules are product-specific
Published schedules illustrate the variation. Meoded lists at least eight hours after the first Lamundo coat, five hours after the second, and 48 hours before sealing. It also gives an application range of 55–85°F and discourages application in direct sun in its product specifications. Those figures apply to the named manufacturer’s system, not to Venetian stucco generally.
By contrast, Chrysalis Surface recommends at least 16 hours after the first traditional lime coat and 24 hours after the second in its contractor application advice. Neither schedule should be transferred to another product without confirmation.
Distinguish among:
- Working time: how long the material remains workable
- Recoat time: when the next coat may be applied
- Burnishing window: when compression or polishing should occur
- Time before sealing: when a protector may be added
- Full cure: when the installed system reaches its intended final condition
A surface that feels dry is not necessarily ready for sealing, cleaning, or water exposure.
Technique controls the appearance
Trowel angle, pressure, stroke direction, coat thickness, blade condition, temperature, humidity, and timing can all affect the result and the installer’s working rhythm.
For systems that call for trowel burnishing, the installer compresses the surface with a clean finishing trowel at the prescribed stage. If material is still too damp, the tool may stick and tear it. Aggressive work after the surface has tightened can also damage the finish or create inconsistent marks.
Keep blades clean and smooth. Dried residue or a damaged edge can scratch the surface. Rounded trowel corners may reduce accidental gouging, and frequent cleaning is especially important on pale colors where dark marks may be conspicuous.
Not every product uses steel-trowel burnishing. Sydney Harbour Paint Company, for example, publishes a method using 600- and 800-grit abrasives, with optional progression to finer grits. Other systems allow machine polishing. Follow the method for the chosen formulation rather than selecting a method solely by the desired shine in the retailer’s five-step application guide.
Traditional lime-plaster application is a skilled craft. Beginners can learn the movements, but a prominent polished wall is a poor place for a first attempt. Practice the complete system on boards and then, if appropriate, on a small or visually contained area. Professional installation may be the lower-risk choice when the finish must match a precise sample under grazing light.
Coverage, materials, labor, and total project cost
Container price alone does not predict project cost. A complete estimate must include measured area, multi-coat coverage, repairs, primers, protective coatings, waste, tools, labor, access, freight, and taxes.
Build a material worksheet
Start with the total wall or ceiling area. Subtract doors and windows only if the estimator or installer normally excludes them; retaining small openings can provide an allowance for edges and waste.
Use this formula:
Net project area ÷ published coverage for the complete required coat system = base quantity
Then add a stated waste allowance based on:
- Wall complexity and number of edges
- Columns, curves, reveals, and niches
- Substrate texture
- Aggregate size
- Installer experience
- Tint consistency and batch planning
- Sample boards and mock-ups
- Expected touch-ups
Do not divide the project area by a single-coat coverage figure if the specification requires several coats. Confirm whether the published coverage represents one coat or the complete system.
Meoded lists approximate complete-system coverage of 20–25 square feet per kilogram for three coats of Lamundo and 8–12 square feet per kilogram for two coats of Tintoretto in its coverage specifications. The figures are product-specific and are not interchangeable.
For a hypothetical 200-square-foot Lamundo wall, dividing by 20–25 square feet per kilogram gives a base estimate of 8–10 kilograms. Adding a stated 10% allowance produces 8.8–11 kilograms before rounding to available package sizes. That example demonstrates the worksheet only; actual consumption may change with substrate texture, coat thickness, technique, and waste.
Price the complete system
A useful budget includes:
- Substrate assessment and moisture investigation where needed
- Crack, joint, and surface repairs
- Skim coating or higher-level wall finishing
- Primer, bonding primer, or quartz primer
- Basecoat and decorative plaster
- Tinting and batch management
- Sample boards or on-wall mock-ups
- Wax, sealer, varnish, or another protector
- Trowels, knives, abrasives, mixing tools, masking, and cleanup materials
- Scaffolding or difficult-access equipment
- Installation labor
- Freight, taxes, and minimum-order quantities
- Contingency for repairs or rework
As displayed on August 11, 2026, The Decora Company’s San Marco acrylic listing showed packages of 1, 5, and 25 kilograms at $28.33, $128.73, and $378.01 respectively on the retailer product page. These are volatile retailer prices, not market averages, and they exclude preparation, primer, protection, freight, tools, and labor.
A commercial guide reports an installed figure of €80–€100 per square meter in its Venetian-stucco overview. Because the source provides no clear location, date, scope, wall condition, or market methodology, the figure is too weak to use as a current benchmark.
Obtain itemized local quotes. Each should specify:
- Who prepares the substrate and to what standard
- The approved sample and finish description
- Product, tint, primer, and protection system
- Number of base and decorative coats
- Included masking, access, and cleanup
- Treatment of joints, cracks, corners, and transitions
- Exclusions involving moisture, movement, or concealed defects
- Responsibility for later touch-ups or damage
When comparing DIY work with professional installation, price risk as well as labor. A failed polished finish may require abrasion, repriming, replacement material, and complete refinishing. The risk is greatest on prominent walls, dark or highly polished finishes, complex architectural surfaces, and imperfect substrates.
Maintenance, repairs, and common installation failures
Maintenance depends on the binder and protective finish. Follow the installed system’s care instructions rather than assuming every Venetian stucco surface can be cleaned or polished in the same way.
Where approved, conservative routine care generally means water, mild or neutral soap, a soft cloth, and thorough drying. Marmo Stucco describes that approach in its supplier guidance on cleaning Venetian polished plaster. Test the prescribed method in an inconspicuous area first.
Do not use aggressive abrasives, strong solvents, or improvised turpentine treatments unless the product manufacturer has confirmed compatibility and supplied appropriate handling instructions.
Understand the protective layer
Wax, sealer, or varnish may affect:
- Final sheen
- Apparent color depth
- Resistance to dirt, water residue, oils, and staining
- Ease of cleaning
- Compatibility with future recoating and repair
The evidence does not establish one universal renewal schedule. A lightly used bedroom wall and a kitchen splashback receive different exposure. Inspect the surface and follow the protector manufacturer’s maintenance instructions.
Record the exact plaster, tint, primer, and protector used. Retain labeled leftover material only when its storage instructions allow. Documentation can make later testing or repair more informed.
Common failures and likely contributors
A visible symptom can have several causes, so troubleshooting should begin with inspection rather than an immediate cosmetic patch.
| Symptom | Possible contributors | Sensible response |
|---|---|---|
| Scratches or dark marks | Dirty, damaged, or unsuitable trowel; dried material on blade; excessive pressure | Stop, clean and inspect the tools, then test the prescribed correction method |
| Tearing or lifted material during polishing | Burnishing too early; damp material causing the tool to stick | Wait for the specified working stage and follow the product’s repair process |
| Patchy or uncontrolled movement | Inconsistent thickness, pressure, strokes, absorbency, or drying | Compare with the sample and check substrate and primer uniformity |
| Ridges or heavy texture | Coats applied too heavily, poor trowel control, or uneven substrate | Do not bury defects under more material; determine whether approved abrasion or refinishing is required |
| Uneven sheen | Variable burnishing pressure or timing, uneven sanding, or inconsistent protector | Test any correction in a bounded area before altering the full wall |
| Peeling or delamination | Weak substrate, contamination, incompatible primer, moisture, or system mismatch | Investigate adhesion and substrate conditions rather than covering the failure |
| Cracks | Movement in the substrate, joints, or surrounding assembly | Identify and address the cause before decorative repair |
| Stains | Insufficient protection, incompatible cleaner, water residue, oil, or absorbed contamination | Follow the installed system’s stain guidance and avoid unapproved solvents |
Skipping the sample board is itself a planning failure. An installer and owner can both act reasonably yet disagree about how much tonal movement is desirable. A documented sample makes the intended standard tangible.
Repairs may remain visible
Venetian stucco is handcrafted. A localized repair may need to match tint, coat transparency, stroke pattern, texture, compression, sheen, and protection.
Small damage may be repairable within a natural visual boundary. In other cases, refinishing a complete wall, panel, or architectural section may create a more coherent result. Do not promise that a patch will be invisible.
Consult an experienced installer for substantial cracks, deep chips, delamination, repeated movement, or damage in direct-water and exterior locations. These conditions may involve the substrate or assembly rather than only the decorative surface.
Removal or replacement may involve preparing or removing the protective layer, abrading the finish, applying a compatible primer, and installing a replacement coating. The correct sequence depends on what is already on the wall. Previously waxed, sealed, or unidentified surfaces should be tested before large-scale recoating.
Frequently asked questions
Is Venetian stucco the same as regular exterior stucco?
No. Venetian stucco is generally a thin, trowel-applied decorative finish used to create tonal depth, stone-like texture, or polish. Conventional building stucco is generally thicker and coarser and is commonly associated with exterior wall systems in Decorfin’s comparison of the two finish categories.
Some decorative Marmorino or mineral plasters are approved for exterior surfaces, but that does not make them conventional exterior stucco or make every Venetian finish exterior-rated.
Can Venetian stucco be used in a shower?
Only consider it when the exact finish and complete installation are documented for direct-water exposure. General bathroom suitability or a recommendation to seal kitchen and bathroom walls does not, by itself, establish shower suitability in Sydney Harbour Paint Company’s sealing guidance.
Require written confirmation covering the underlying water-management system, substrate, transitions, penetrations, plaster, protector, curing period, and cleaning method. Do not assume a generic wax or sealer is sufficient evidence for the complete installation.
Does Venetian stucco always need wax or sealer?
No. Protection requirements vary by formulation, exposure, and manufacturer. Some suppliers treat sealing as optional in ordinary dry interiors while requiring it in showers, saunas, spill-prone areas, or specified furniture applications.
A topcoat can also change sheen and apparent color depth. Include it on the sample board and use only the protector specified as compatible with the selected plaster.
Can a beginner apply Venetian stucco?
A beginner can practice the tools and techniques, particularly with a product designed for DIY application. Traditional lime plaster and highly polished work are technique-sensitive, however. Substrate defects, heavy coats, poor timing, and inconsistent trowel pressure can remain visible.
Practice the entire system on boards before working on a prominent wall. A small matte or lightly textured area is generally a lower-risk learning project than a dark, high-gloss wall under directional light. Use a professional when the required finish, substrate condition, exposure, or cost of rework makes experimentation impractical.
How long does Venetian stucco take to apply and dry?
There is no universal schedule. A project may involve repair work, primer drying, two or three decorative coats, polishing, curing, sealing, and an additional waiting period before handling or moisture exposure.
Published contractor guidance for traditional lime plaster includes at least 16 hours after a first coat and 24 hours after a second, while named manufacturer systems publish different intervals in Chrysalis Surface’s traditional-plaster guidance. Build the schedule from the selected technical data sheet and include time for sampling, preparation, curing, and protection—not only the hours spent troweling.
A practical final selection sequence is:
- Define the desired sheen, texture, movement, and color.
- Classify the location by water, weather, heat, handling, and traffic exposure.
- Inspect the substrate for flatness, adhesion, cracks, moisture, and movement.
- Shortlist only products explicitly approved for those conditions.
- Review the label, technical data sheet, safety data sheet, and compatible primer and protector.
- Price the complete system, including preparation, labor, tools, freight, and rework risk.
- Produce and approve a finished sample under the room’s actual lighting.
- Let the selected product documentation—not the broad Venetian stucco label—govern preparation, coat count, drying, polishing, sealing, safety, and maintenance.