
21 min read ·
How to Build a Bicycle for Long, Self-Supported Rides
A purpose-built randonneur is optional; an endurance-road, gravel, touring, cyclocross or conventional road bicycle may be adapted to the route.
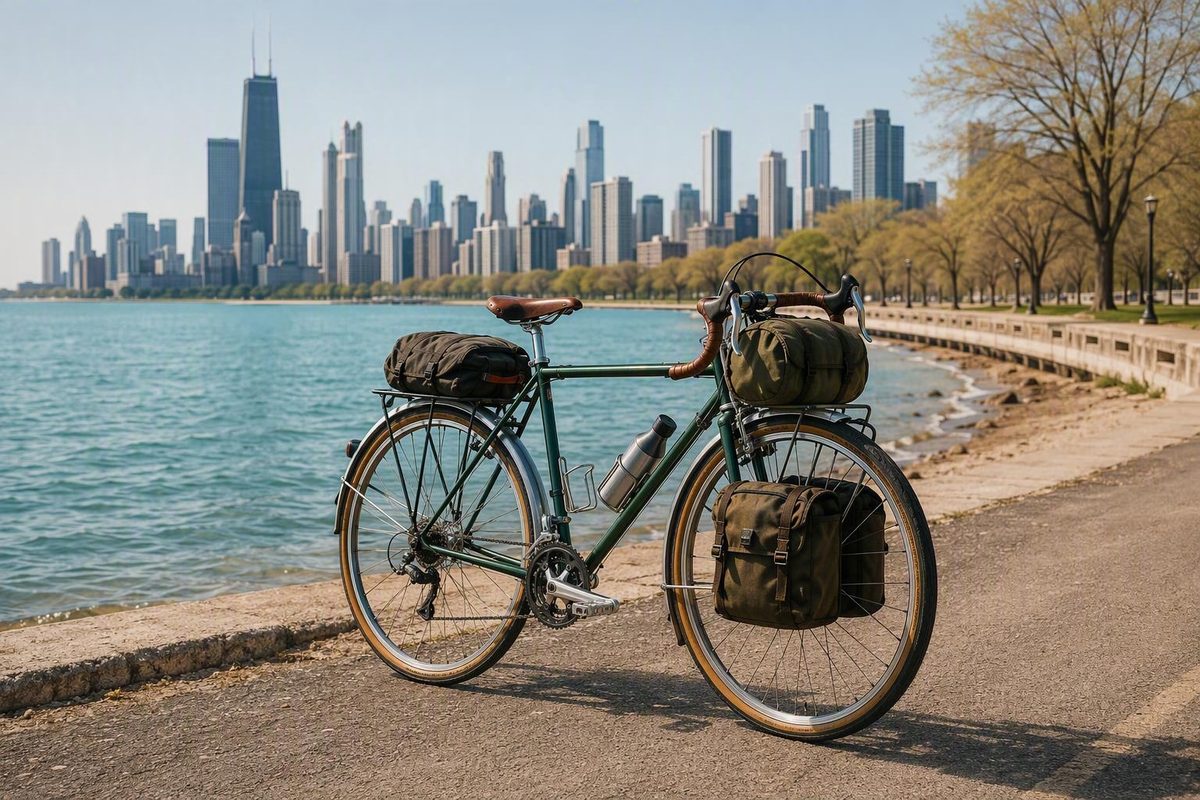
A randonneur bicycle is best understood by what it enables: sustained, efficient riding over long distances while carrying enough equipment to remain largely self-supporting. It does not require a particular frame material, wheel size, brake system, steering geometry, or traditional French appearance.
The right setup is one a rider can fit comfortably, maintain confidently, gear for late-ride climbing, illuminate adequately, and load without undermining control. That may be a purpose-built randonneur, but it may also be an endurance-road, gravel, touring, cyclocross, or conventional road bicycle adapted to the route.
What makes a bicycle a randonneur?
A randonneur bicycle is selected and configured for long rides such as brevets, unsupported centuries, overnight road events, and lightweight tours. It occupies the space between racing minimalism and expedition-scale cargo capacity: the bicycle should make steady forward progress while carrying food, clothing, navigation, lights, tools, and other essentials.
There is no single technical specification governing the category. Documented builds include steel and titanium frames, 650B and 700C wheels, rim and disc brakes, derailleur and internal-hub gearing, drop and flat handlebars, and both traditional and contemporary equipment. An archive of randonneur-style bicycles illustrates this range, from constructeur-inspired machines to modern all-road builds with disc brakes, thru-axles, and wider tires (traditional and modern randonneur builds).
What ties these bicycles together is not appearance but a recurring set of priorities:
- A riding position sustainable for many hours
- Reliable wheels, brakes, drivetrain, and controls
- Efficient, predictable handling
- Gearing low enough for the terrain and accumulated fatigue
- Tires suited to the intended surface
- Space for food, tools, clothing, and navigation
- Dependable front and rear lighting
- Fender compatibility when prolonged wet conditions are likely
- Components the rider knows how to operate and maintain
A conventional road bicycle may begin to look “randonneur-style” after gaining a small rack or bag, fenders, a frame pump, practical gearing, and generator-powered lighting. Even builders disagree about the label. Chapman Cycles presented one lightweight steel bicycle with a front rack, pump, fenders, and an engageable rim dynamo; although others called it a randonneur, its builder still regarded it as a road bike (Chapman’s randonneur-equipped road bike).
That disagreement is useful. A bicycle does not cease to be suitable because it lacks steel tubing, low-trail geometry, a front rack, 650B wheels, or a dynamo hub. Conversely, traditional accessories cannot make an uncomfortable or poorly maintained bicycle appropriate for a long brevet.
Rider-contributed profiles also show the category’s breadth. They include a 700C bicycle with cantilever brakes and derailleur gearing, a 650B low-trail bicycle with wide tires and raised bars, and a titanium flat-bar bicycle with a Rohloff internal-gear hub and mechanical discs. Their owners reported using these machines on events from 400 to 1,200 kilometers, but those histories are personal reports rather than controlled comparisons (rider-contributed randonneur setups).
These examples show that varied configurations can work. They do not establish which frame, wheel, brake, or drivetrain is best for everyone. The practical definition remains simple: a randonneur bicycle is a bicycle made fit for long, substantially self-supported riding.
Randonneur vs. touring, endurance-road, and gravel bikes
The boundaries among randonneur, touring, endurance-road, and gravel bicycles are porous. Rather than treating them as rigid categories, compare them by intended ride, cargo load, surface, gearing, handling, and accessory integration.
| Bicycle type | Primary emphasis | Typical cargo | Handling priority | Common practical needs |
|---|---|---|---|---|
| Randonneur | Efficient, sustained long-distance riding | Modest self-support load | Predictability with the intended bag | Lights, practical gearing, repairs, weather protection |
| Heavy-duty touring | Travel with substantial luggage | Large panniers and camping equipment | Stability under heavy loads | Strong wheels, very low gearing, heel clearance, many mounts |
| Endurance-road | Road efficiency with a less aggressive position | Usually light | Responsive paved-road handling | Bottle capacity and all-day fit |
| Gravel | Unpaved and mixed-surface capability | Light to bikepacking-scale | Control on loose or rough terrain | Wider tires, debris clearance, secure luggage |
| Lightweight touring | Multi-day travel with restrained cargo | Small panniers or compact bags | Efficiency with moderate load stability | More capacity without expedition-scale construction |
A randonneur is generally intended to maintain momentum while carrying enough equipment to solve foreseeable problems. It is not a racing bicycle stripped to the minimum, but neither is it necessarily designed for four panniers, a heavy tent, cooking equipment, and weeks of supplies. Luggage may be limited to a handlebar bag, saddlebag, frame bag, or compact rear bag.
A heavy-duty touring bicycle shifts the compromise toward cargo. Longer rear triangles can provide pannier and heel clearance, while strong wheels, low gearing, numerous mounts, and load-oriented geometry support substantial luggage. Those choices may add weight or make unloaded handling feel less responsive, although the result depends on the complete build. Guidance based on long-term, heavily loaded touring understandably emphasizes comfort, durability, parts access, wider tires, strong wheels, and low climbing gears (long-term touring-bike considerations).
Lightweight touring is a different case. A rider staying indoors or carrying compact camping equipment may have needs much closer to a brevet rider’s. A lightly loaded randonneur can work well for this kind of travel, but it should not automatically be assumed suitable for remote expedition touring. Heavy panniers can reveal limitations in wheel strength, gearing, heel clearance, braking, or handling that never appear with a small brevet bag.
Endurance-road bicycles overlap strongly with randonneur needs. Both may provide an all-day road position and efficient paved-road performance. The distinction usually appears in equipment integration. A brevet setup may require more tire clearance, full fenders, secure luggage, extended lighting, extra bottles, repair equipment, and cockpit space for navigation. An endurance-road bicycle can be an excellent foundation when it accommodates those needs cleanly.
Gravel bicycles also overlap. Wider tires and disc brakes can suit brevets that include broken pavement, dirt roads, or maintained gravel, and many gravel frames offer generous bottle and luggage mounts. Yet aggressive off-road positioning, suspension features, very large bikepacking bags, and maximum mud clearance are not defining randonneur requirements. Whether a gravel setup feels appropriate on a paved brevet depends on its tires, gearing, position, and complete configuration—not simply the category name.
A dated forum discussion among touring and long-distance riders described the distinction as one of degree rather than an absolute divide. Participants commonly argued that one bicycle could perform both roles when the touring load was modest, while noting compromises involving wheelbase, racks, gearing, wheel strength, and handling. Those observations reflect participant experience, not controlled evidence (touring and randonneuring crossover discussion).
Category names are therefore only a first filter. A touring, gravel, cyclocross, endurance-road, or conventional road bicycle may work if it fits the rider and accommodates the necessary tires, gearing, lighting, luggage, and weather protection. Evaluate the bicycle against the actual route and load, not the label printed on the frame.
Fit, geometry, and the effect of luggage on handling
A frame with theoretically ideal trail, tubing, mounts, and tire clearance is unsuitable if the rider cannot sustain its position.
Long-distance fit does not produce one standard posture. Experienced riders use raised handlebars, several hand positions, supportive saddles, aero extensions, platform or clipless pedals, and different combinations of reach and bar height. Aero extensions can provide another place for the forearms and hands, but their suitability depends on the rider and the rest of the cockpit. Saddles and pedal systems are similarly individual.
Establish the contact points before pursuing fine distinctions in steering geometry. Assess saddle position, bar reach and height, control placement, and hand positions over progressively longer rides. Persistent pain, numbness, joint irritation, or difficulty controlling the bicycle calls for fit assessment rather than an assumption that different luggage or tires will solve the underlying problem.
What trail means in practice
It does not determine handling by itself.
Low-trail geometry is traditionally associated with bicycles designed around a modest load over the front wheel. A small rack and handlebar bag keep frequently used items accessible and may be part of the intended steering system. When the frame, rider, tires, cockpit, and load work together, this can produce responsive, predictable handling.
It is not a universal randonneur standard. Many successful long-distance bicycles use conventional road or touring geometry, and riders differ in how they respond to lighter steering—particularly at higher speeds or when changing between loaded and unloaded configurations.
A review of the third-generation Soma Grand Randonneur offers a bounded example. The reviewer found the low-trail bicycle more predictable with its front rack and bag. After removing the cargo and converting it into a flat-bar gravel setup, the rider found it less successful and reported occasional shimmy. The bicycle was ultimately judged better suited to its more traditional front-loaded configuration (Soma Grand Randonneur firsthand review).
That report concerns one rider, one large frame size, and one custom assembly. Its wheels, tires, cockpit, fit, and cargo were specific to that setup. It does not prove that every low-trail bicycle requires front weight, that all unloaded examples handle poorly, or that shimmy is universal to the model.
Front and rear loads affect a bicycle differently
Touring frames often use longer rear triangles for pannier and heel clearance, while a longer wheelbase may contribute to calmer behavior under load.
Neither arrangement is automatically superior. The important question is whether the bicycle remains predictable with the exact cargo system the rider intends to use.
A practical evaluation can proceed in stages:
- Establish fit first. Set the contact points and confirm basic comfort before assessing luggage.
- Ride unloaded. Include normal turns, climbs, descents, braking, and representative road surfaces.
- Install the intended bag or rack. Follow the frame, rack, and bag manufacturers’ installation instructions.
- Add normal cargo gradually. Begin with the load expected on the event rather than the bag’s maximum capacity.
- Repeat a familiar route. Compare steering, braking, climbing, and out-of-saddle movement.
- Try the normal range of riding speeds. Note whether the loaded behavior remains understandable and controlled.
- Address problems before the event. Reduce, repack, or relocate the load, or consult a qualified mechanic if the cause is uncertain.
The objective is not to make every bicycle feel identical. It is to confirm that the intended configuration remains manageable before committing to a long event.
Wheels, tires, fenders, and gearing for the route
Both 650B and 700C wheels have been used successfully for randonneuring. Neither is universally better. The decision should account for frame clearance, desired tire volume, rider and frame size, handling preferences, fender space, and access to replacement tires and tubes.
This can be useful when a designer is balancing tire space, toe clearance, and fit. A 700C wheel may fit naturally into a road-oriented frame and align better with a rider’s existing equipment or local supplies.
Local availability is a legitimate design consideration. In rider-contributed profiles, a Box Dog Pelican used 700×35 tires, while a low-trail Kogswell P/R used 650B wheels with 42 mm tires. The Pelican’s owner specifically reported choosing 700C because nearby shops did not stock 650B replacement tires or tubes (contrasting 700C and 650B setups).
Choose tire capacity, not just the sidewall number
Road-oriented examples in the evidence use tires around 32–35 mm. Rough-road and mixed-surface examples extend into the low-to-mid 40 mm range, with some documented frames accommodating approximately 47 mm. These are evidence-bounded setup bands, not prescriptions (examples of wider-tire randonneur builds).
A wider tire may provide more volume and rough-surface capability, but it must be compatible with the frame, fork, rim, brakes, and fenders.
Before choosing a tire-and-fender combination, use the clearance requirements supplied by the frame, tire, rim, brake, and fender manufacturers. If compatibility is uncertain—or if a wheel, brake, or fender installation raises mechanical concerns—have the complete setup assessed by a qualified bicycle mechanic.
Mounting eyelets establish only that an accessory may be fitted. They do not prove that every tire-and-fender combination will fit, and advertised tire clearance without fenders does not necessarily apply after full fenders are installed.
There is no universal pressure recommendation based on tire width alone. Treat pressure as a setup variable governed by component guidance and testing rather than copying an unrelated rider’s number.
Gear for the hardest hour, not the freshest one
Randonneur gearing should be selected for the steepest expected terrain, the normal luggage load, and fatigue after many hours. Racing gearing chosen for a short group ride may be unnecessarily difficult late in a brevet.
Documented examples illustrate the direction without defining a standard. One owner’s 700C build paired 48/32 chainrings with an 11–32 cassette; this is an owner-reported configuration, not a universal formula.
The reviewed Soma used 48/34 chainrings with an 11–34 cassette, again illustrating relatively low road gearing rather than prescribing it for every rider (reviewed Soma drivetrain).
Use route elevation and realistic riding history to decide whether the lowest gear is sufficient. Consider repeated climbing rather than only the maximum gradient, and account for luggage, surface, headwinds, and the difference between reaching a climb early and reaching it after many hours.
Both derailleur and internal-hub drivetrains appear in long-distance builds. One Rohloff-equipped owner valued evenly stepped gearing and the ability to shift while stopped. That is an owner report, not evidence that an internal hub is categorically better.
Brakes, lighting, fenders, and roadside serviceability
The suitable choice depends on the route, weather, descents, rider preferences, wheel system, maintenance familiarity, and access to compatible parts.
A useful comparison asks:
- What conditions and descents are expected?
- How much lever effort can the rider sustain?
- Is the system compatible with the chosen wheels, tires, and fenders?
- Does the rider understand routine operation and maintenance?
- Are compatible replacement parts available along the route?
- What work can the rider realistically perform away from a shop?
- What inspection and service does the manufacturer specify?
Rim brakes place the braking surface at the wheel rim. Disc brakes separate the braking surface from the rim, with either cable or hydraulic actuation. Beyond those basic distinctions, performance and service requirements depend on the exact components and installation. Follow manufacturer guidance rather than assuming that one broad brake category is inherently safer or more suitable.
Documented long-distance builds have used cantilever brakes, long-reach calipers, and mechanical discs. This establishes feasibility, not equal measured performance. Forum discussions from 2004 and 2014 contain conflicting rider opinions about wet-weather behavior, hand fatigue, heat, and repairability; they are too dated and anecdotal to settle questions about current equipment (rider debate about brakes and serviceability).
Lighting for rides that may outlast daylight
Dynamo hubs are common in long-distance builds because they can power compatible lights while the bicycle is moving. Battery lights and engageable rim dynamos can also work when their output, runtime, mounting, and weather suitability match the event.
The Chapman road bicycle demonstrates a less common alternative. Its builder reported a complete weight of 18.5 pounds despite fitting fenders, a pump, a front rack, and a seatstay-mounted Velogical rim dynamo. The dynamo could be disengaged until needed, and the builder reported that it did not slip in wet conditions. Both the weight and dynamo performance are builder-reported rather than independently tested.
Whatever the power source, evaluate the lighting as a complete system:
- Beam pattern and aim
- Runtime under expected conditions
- Rear-light visibility
- Mounting compatibility with bags and fenders
- Wiring or charging requirements
- A plan for loss of the primary light
- Ease of operating the system while fatigued
A dynamo does not automatically satisfy an organizer’s requirements. Lighting, backup-light, reflectivity, and visibility rules can vary by event and may change. The rider’s current event documentation controls; verify it directly with the organizer rather than relying on an old retailer summary or another participant’s memory.
Fenders and serviceability
Their usefulness depends on suitable clearance and correct installation. Fender mounts indicate potential compatibility, not that fenders are included or that every model and tire combination will fit.
Use the frame and fender manufacturers’ instructions, and seek qualified mechanical help when compatibility or installation is uncertain. The same principle applies to racks, lighting hardware, and wiring.
Serviceability is route-specific. A domestic brevet near towns and event support presents a different problem from a remote international tour. The former may justify equipment supported by nearby shops or a planned exit option. The latter places more emphasis on parts access and the rider’s ability to manage faults far from assistance.
Choose systems you understand and can inspect before departure. Familiarity with the installed equipment is often more useful than theoretical simplicity.
Luggage: front bag, frame bag, or rear rack?
The randonneuring principle is to carry enough for self-support without automatically adding touring-scale capacity. Every larger bag invites more equipment, and every extra item must be carried and controlled.
A small handlebar or front-rack bag is traditional because it keeps frequently used items accessible. Some bags also provide a visible platform for a cue sheet or map.
Front luggage should be considered together with geometry. On a front-load-oriented bicycle, a modest bag may be part of the intended configuration. On another bicycle, the same bag may produce handling the rider dislikes. Bag position, support, load height, and cargo distribution all influence the result.
Other systems offer different compromises:
- Handlebar bag: Convenient access, but it can crowd controls, lights, cables, or hand positions.
- Front-rack bag: Provides support when properly matched to the rack, while placing cargo on the steering assembly.
- Frame bag: Keeps luggage within the main frame area but may reduce bottle capacity or access.
- Saddlebag: Adds useful capacity without loading the handlebar; support and clearance requirements vary.
- Seat pack: Avoids a rack and can suit light loads, though access generally requires stopping.
- Top-tube bag: Useful for small items but may interfere with the rider or cockpit, depending on placement.
- Rear rack and rack-top bag: Keeps the handlebar area clear but adds hardware and places cargo behind the rider.
- Panniers: Appropriate when genuinely needed, but require attention to the bicycle’s intended load, rack compatibility, heel clearance, gearing, and wheels.
There is no universally preferred arrangement. Some riders value frame bags because they avoid racks and keep cargo central. Others prioritize rear-rack compatibility for versatility. A touring bicycle can often become more brevet-oriented simply by leaving large panniers at home and using a compact bag. Commercial conversion guidance similarly recommends reducing a touring bicycle’s cargo system for brevet use, though that advice is not a comparative test (adapting a touring bicycle for brevet use).
Mounts establish potential compatibility, not inclusion. Rack eyelets do not mean a rack is supplied; fender mounts do not mean fenders are included. A bicycle described as dynamo-ready may still require a hub, lights, wiring, and installation.
A practical packing hierarchy
Pack in order of consequence:
- Ride essentials and required visibility equipment: navigation, identification, organizer-required items, lights, and an event-appropriate backup plan.
- Nutrition and fluids: enough to reach planned resupply points with a reasonable margin.
- Weather protection: layers suited to the forecast and expected exposure.
- Tools and repair supplies: items matched to the installed tires, wheels, drivetrain, brakes, and fasteners.
- Medication and personal necessities: stored securely and accessibly.
- Comfort extras: added only after the important categories are covered.
Install and load the exact luggage system before the event, following the bag, rack, and bicycle manufacturers’ instructions. Use representative rides to decide whether access, position, and handling are acceptable. If the system moves unexpectedly, interferes with the bicycle, or creates uncertainty about control, revise it or seek qualified mechanical assessment before riding farther.
Keep the distinction between a modest brevet load and heavy touring panniers clear. Substantial cargo may call for stronger wheels, additional heel clearance, lower gearing, and a frame intended for that load. More mounting points do not prove that a lightweight bicycle is designed to carry every possible accessory simultaneously.
How to choose or convert a bicycle for randonneuring
Many existing bicycles can be adapted for randonneuring when the foundation is sound. Begin with fit, mechanical condition, gearing, clearance, and handling—not decorative accessories.
Step 1: Confirm sustainable fit
Assess saddle position, handlebar reach and height, control placement, and hand positions over progressively longer rides. A short parking-lot test cannot establish all-day suitability. Resolve significant fit problems before buying racks, bags, or a wheelset intended for the frame.
Step 2: Inspect the mechanical foundation
Consider the condition of the frame, fork, wheels, tires, brakes, headset, bottom bracket, drivetrain, pedals, and contact points. Follow the inspection and service intervals specified by the relevant manufacturers.
A conversion built on deferred maintenance is not reliable merely because it has new lights and luggage. If the history or condition of a critical component is uncertain, have the bicycle inspected by a qualified mechanic.
Step 3: Define the route
Write down the expected distance, elevation, surface, weather range, darkness, resupply spacing, and availability of mechanical help. These details determine whether the bicycle needs different tires, lower gearing, more lighting capacity, fenders, or additional repair equipment.
Avoid configuring a bicycle for an abstract idea of randonneuring. A dry, paved 200-kilometer route near towns presents different needs from a mixed-surface overnight event through remote terrain.
Step 4: Choose the smallest adequate cargo system
List what the ride genuinely requires, then select a bag that carries it securely. Do not begin with the largest rack or bag and fill all available space. Keep frequently used items accessible and avoid carrying equipment without a clear purpose.
Step 5: Confirm compatibility
Verify tire, rim, brake, fender, bottle, axle, rack, luggage, and lighting compatibility against current manufacturer specifications. Install the complete system according to its instructions. Where specifications conflict or compatibility is uncertain, consult the manufacturer or a qualified bicycle mechanic.
Step 6: Add brevet equipment in priority order
A sensible order is:
- Dependable front and rear lighting
- Visibility equipment required by the organizer
- Secure, appropriately sized luggage
- Repair tools and component-specific spares
- Tires suited to the route
- Fenders when conditions and compatibility justify them
- Lower gearing when the terrain and expected fatigue demand it
- Optional convenience equipment after testing
A touring bicycle often needs subtraction rather than wholesale replacement. Remove expedition-scale panniers, unnecessary racks, and surplus cargo; install a smaller bag; and assess the resulting setup. A heavier frame may matter less than fit, familiarity, and established reliability.
Separate wheelsets as an optional strategy
Two wheelsets can broaden one bicycle’s role. A road-oriented set might carry narrower tires for paved brevets, while another could use wider or more durable tires for touring and mixed surfaces.
Compatibility must be verified across axle dimensions, freehub and cassette, brakes, tire and fender clearance, gearing, and any sensor or dynamo requirements. Include the full cost of wheels, tires, tubes or tubeless hardware, cassette, brake components, and labor. The strategy is less useful if every swap requires extensive adjustment.
Four practical setup templates
Paved brevet: Consider approximately 32–35 mm tires where the frame permits, modest luggage, sufficient bottle capacity, practical road gearing, and dependable lighting. Add full fenders when wet conditions are likely and the complete system is compatible.
Poor-road or mixed-surface brevet: Use wider tires where the frame and components allow. Documented examples extend into approximately 42–47 mm territory, but the actual choice must follow the bicycle’s specifications. Prioritize secure luggage and gearing appropriate to loose or steep climbing.
Lightweight touring: Add enough capacity for overnight equipment without assuming expedition loads. A small rack, saddlebag, frame bag, or compact pannier arrangement may be sufficient. Evaluate the bicycle with the complete intended load.
Heavy or remote touring: Favor a frame and wheels intended for substantial cargo, with suitable heel clearance, low gearing, durable luggage fittings, and service priorities matched to the destination. A dedicated touring bicycle may be more appropriate than extending a lightweight randonneur beyond its intended use.
The Soma Grand Randonneur and Rodriguez Rainier illustrate contrasting interpretations rather than products to rank. The third-generation Soma was presented as a front-load-oriented design updated with disc mounts and thru-axle compatibility while retaining a threaded fork. Its reviewer preferred the traditional front-rack configuration to a cargo-free flat-bar conversion, but that remains one rider’s experience.
The manufacturer’s 2026 Rainier page presents a more road-oriented, rim-brake approach and lists clearance for tires up to 32c with fenders, three bottle mounts, fender eyelets, and rear-rack mounts (manufacturer-listed Rainier specifications). These details are time-sensitive, and mounts or clearance should not be mistaken for included racks or fenders.
Custom builds, historical examples, production frames, owner showcases, and retailer listings are not directly comparable, so they do not support a ranked list or representative price range. Verify current specifications, prices, availability, wait times, accessory inclusion, and event rules with manufacturers and organizers immediately before acting.
Finally, complete a shakedown using the intended luggage and equipment. Ride in daylight and darkness, over representative surfaces, and in expected weather where practical. Confirm comfort, light operation, cargo stability, braking, shifting, and access to food and bottles. Address fit, handling, or mechanical concerns before increasing the distance.
The right randonneur setup is not the bicycle that most closely matches a historical image. It is the bicycle you can fit comfortably, maintain confidently, illuminate adequately, gear for tired climbing, and load without undermining control. Audit and test the bicycle you already own before assuming that another category label will solve the problem.
Frequently asked questions
Can any road bike be used as a randonneur bicycle?
Many road bicycles can be adapted, but not every example will suit every brevet. The foundation must provide sustainable fit, sound mechanical condition, adequate gearing, appropriate tires, dependable lighting, and a secure way to carry essentials.
Potential limitations include an excessively aggressive position, inadequate tire or fender clearance, high gearing, limited bottle capacity, or poor luggage and light integration. Rack eyelets are not mandatory because rack-free bags exist, but inadequate clearance or an unsustainable fit is harder to overcome.
Is low-trail geometry necessary for randonneuring?
No. Low-trail geometry is one traditional approach, often associated with a modest front-rack or handlebar-bag load. It can work well when the frame, rider, tires, cockpit, and cargo are configured together.
Many riders use conventional road, endurance, gravel, and touring geometries. The relevant question is whether the bicycle handles predictably with the intended luggage, not whether it meets a preferred trail number.
Are 650B or 700C wheels better for a randonneur bicycle?
Neither has a universal advantage. Choose according to frame and rider fit, desired tire volume, handling preferences, fender clearance, existing equipment, and local access to replacement tires and tubes.
A 650B setup can make room for wider tires in a compatible frame. A 700C setup may fit a road-oriented design naturally or align better with locally available supplies. Actual compatibility matters more than abstract claims that one diameter is inherently faster or more comfortable.
Can one bicycle handle both randonneuring and touring?
Yes, especially when touring means lightweight travel with restrained luggage. A touring bicycle can often become brevet-oriented by reducing cargo, using a smaller bag, fitting route-appropriate tires, and adding the necessary lighting.
The compromise grows as the touring load increases. Heavy panniers may call for stronger wheels, lower gearing, more heel clearance, and geometry intended for substantial cargo. An unloaded or lightly loaded touring bicycle will often adapt more readily to brevets than a lightweight randonneur will adapt to expedition-scale loads, but the result depends on the individual bicycle.
Do I need a dynamo hub for randonneuring?
No. A dynamo hub is common because it can power compatible lights while the bicycle is moving, which is useful on overnight and multi-day events. It remains only one option.
Battery lights and engageable rim dynamos can also work when their output, runtime, mounting, and weather suitability match the event. Whatever system you choose, test it under realistic conditions and plan for failure of the primary light.
Do not assume that a dynamo automatically satisfies event requirements. Verify current lighting, backup-light, reflectivity, and visibility rules directly with the organizer.